Countertop ice makers are a convenient addition to any kitchen, providing a steady supply of ice for drinks, parties, and everyday use. However, like any appliance, they require regular cleaning to function properly and produce clean, safe ice. This comprehensive guide will walk you through the process of cleaning your countertop ice maker, ensuring it operates efficiently and maintains hygiene.
Importance of Cleaning Your Ice Maker
Over time, ice makers can accumulate mineral deposits, mold, and bacteria, all of which can affect the quality of the ice produced. Cleaning your ice maker regularly not only extends its lifespan but also ensures that the ice is safe for consumption. Furthermore, a clean machine operates more efficiently, saving you energy and potentially reducing your utility bills.
Materials Needed
Before starting the cleaning process, gather the following materials:
– Mild Dish Soap: A gentle soap will help break down grime without damaging surfaces.
– White Vinegar or Ice Maker Cleaner: Vinegar is a natural disinfectant, while specialized cleaners can target mineral buildup.
– Soft Cloth or Sponge: Use these to wipe down surfaces without scratching them.
– Clean Water: For rinsing and cleaning.
– Bucket or Basin: To catch water during cleaning.
– Towels: For drying off surfaces and removable parts.
Step-by-Step Cleaning Process
1. Safety First
Start by unplugging your ice maker from the electrical outlet. This step is crucial for your safety and will prevent any risk of electric shock during the cleaning process.
2. Empty the Ice Maker
Remove any ice currently in the ice bin. It’s best to dispose of this ice, especially if it has been sitting for a while, as it may not be clean.
3. Disassemble Parts
If your model allows for it, take off the removable parts, such as the ice bin, drip tray, and any other components. Refer to the manufacturer’s manual for specific disassembly instructions, as some models may have unique features.
4. Clean Removable Parts
Wash the ice bin and any removable components in warm, soapy water. Use a soft cloth or sponge to scrub away any stains or residues. After washing, rinse each part thoroughly with clean water to remove any soap residue and dry them with a towel.
5. Wipe Down the Interior
Using a cloth or sponge dampened with a mixture of warm water and mild dish soap, wipe down the interior of the ice maker. Pay special attention to crevices and corners, as these areas can accumulate grime. Be gentle to avoid damaging any internal components.
6. Sanitize the Interior
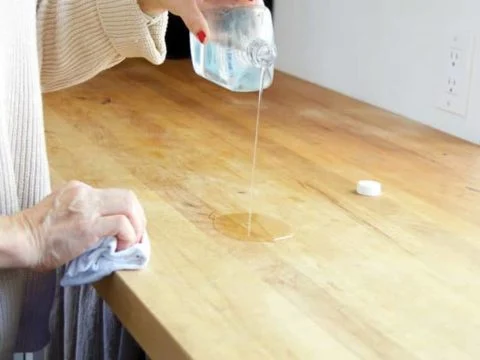
To disinfect the interior, you can use a solution of equal parts water and white vinegar. Alternatively, you can use a specialized ice maker cleaner. Wipe down all surfaces with this solution, allowing it to sit for a few minutes to effectively kill bacteria and mold. Afterward, wipe the interior with a damp cloth to remove any remaining cleaner.
7. Clean the Exterior
Don’t forget to clean the exterior of your ice maker. Use a damp cloth to wipe down all surfaces, including buttons and control panels. Avoid using abrasive cleaners or scrubbers, as these can scratch the surface.
8. Reassemble the Ice Maker
Once all parts are clean and completely dry, reattach the removable components. Make sure everything is securely in place according to the manufacturer’s instructions.
9. Run a Cleaning Cycle (if applicable)
Some countertop ice makers have a built-in cleaning cycle. If your model has this feature, follow the manufacturer’s instructions to run the cycle. This step can help eliminate any remaining buildup and ensure your ice maker is thoroughly clean.
10. Reconnect Power
Once you’ve finished cleaning and reassembling, plug the ice maker back into the electrical outlet. Turn it on and allow it to begin its ice-making cycle.
11. Check Operation
After a short while, check to see if your ice maker is functioning correctly. Monitor the first few batches of ice to ensure everything is working as it should.
Maintenance Tips
– Regular Cleaning: Aim to clean your ice maker every three months, or more frequently if you notice buildup or odors. Regular cleaning prevents larger issues and ensures optimal performance.
– Monitor Water Quality: Use filtered water if possible, as this can reduce mineral buildup in the machine and improve the taste of the ice.
– Check for Issues: Regularly inspect the ice maker for any signs of mold, unusual odors, or mechanical issues. Address any problems immediately to prevent more significant repairs later.
– Use Ice Quickly: If you make a lot of ice, try to use it within a few days. Ice that sits for too long can absorb odors from the freezer, compromising its quality.
– Follow Manufacturer Guidelines: Always refer to the user manual for specific cleaning and maintenance instructions tailored to your model.
Conclusion
Cleaning your countertop ice maker is a straightforward process that greatly benefits its performance and the quality of ice produced. By following the steps outlined in this guide and maintaining a regular cleaning schedule, you can ensure that your ice maker remains in excellent condition for years to come. A clean ice maker not only enhances your beverage experience but also contributes to a healthier kitchen environment. So, roll up your sleeves and give your ice maker the attention it deserves!


